
Easy upcycle: DIY clay-effect paint to turn junk into trendy decor pieces
I love a good DIY.
And I especially love a good DIY when you can make something out of nothing.
So when I saw this cool #trashtoterracotta trend from Geneva Vanderzeil, I knew I wanted to try it.
The premise is simple:
Mix up your DIY clay-effect paint (using ingredients you already have in the house) and paint over ugly vases to give them a contemporary, on-trend look.
But one thing I saw with every blogger who tried this out…
They bought new vases. 🏺 And some bought new paint, too.
Many went to the thrift shop to find their items — and that’s totally great! Buying secondhand is an awesome way to reduce your footprint and use what’s already in circulation.
But I wanted to find creative solutions that didn’t require buying anything (even secondhand) to spruce up my decor collection.
So I tested this DIY clay-effect paint on some more unusual items I already had at home and while it didn’t work for everything, I was pleasantly surprised at how the experiment turned out…
DIY clay-effect paint: what I tested
This project was actually inspired by this flimsy plastic Pimms pitcher…

(Forgot to take a true “before” photo, like the pro blogger I am. 😑)
When I was 19, studying abroad in Scotland, I spent winter break with a good friend down in Norfolk, England. We went to a pub (drinking legally was still totally new and exciting to little American Whit!) and I drank Pimms for the first time.
I don’t fullllllly remember how we ended up with it but I woke up the next morning with this random memento. 🤷♀️ I accidentally left the pitcher at Joe’s house when I visited him afterwards and his mom kept it in her pantry for over a decade, thinking I might want it back someday. (How right she was!)
Unfortunately, I have no real use for this thing. 😂 But with those fun memories, I felt sappy about throwing it away. So I started brainstorming about ways I could repurpose it and keep it around.
It took about 0.5 seconds to decide on painting it with the DIY clay-effect paint I kept seeing online. 👍 I didn’t know if it would work on plastic but I figured since it was free, I might as well give it a try!
Then I decided to shop my house to find other items I could transform using this technique. I tested out a:
Candle jar
Whiskey bottle
Sauerkraut jar
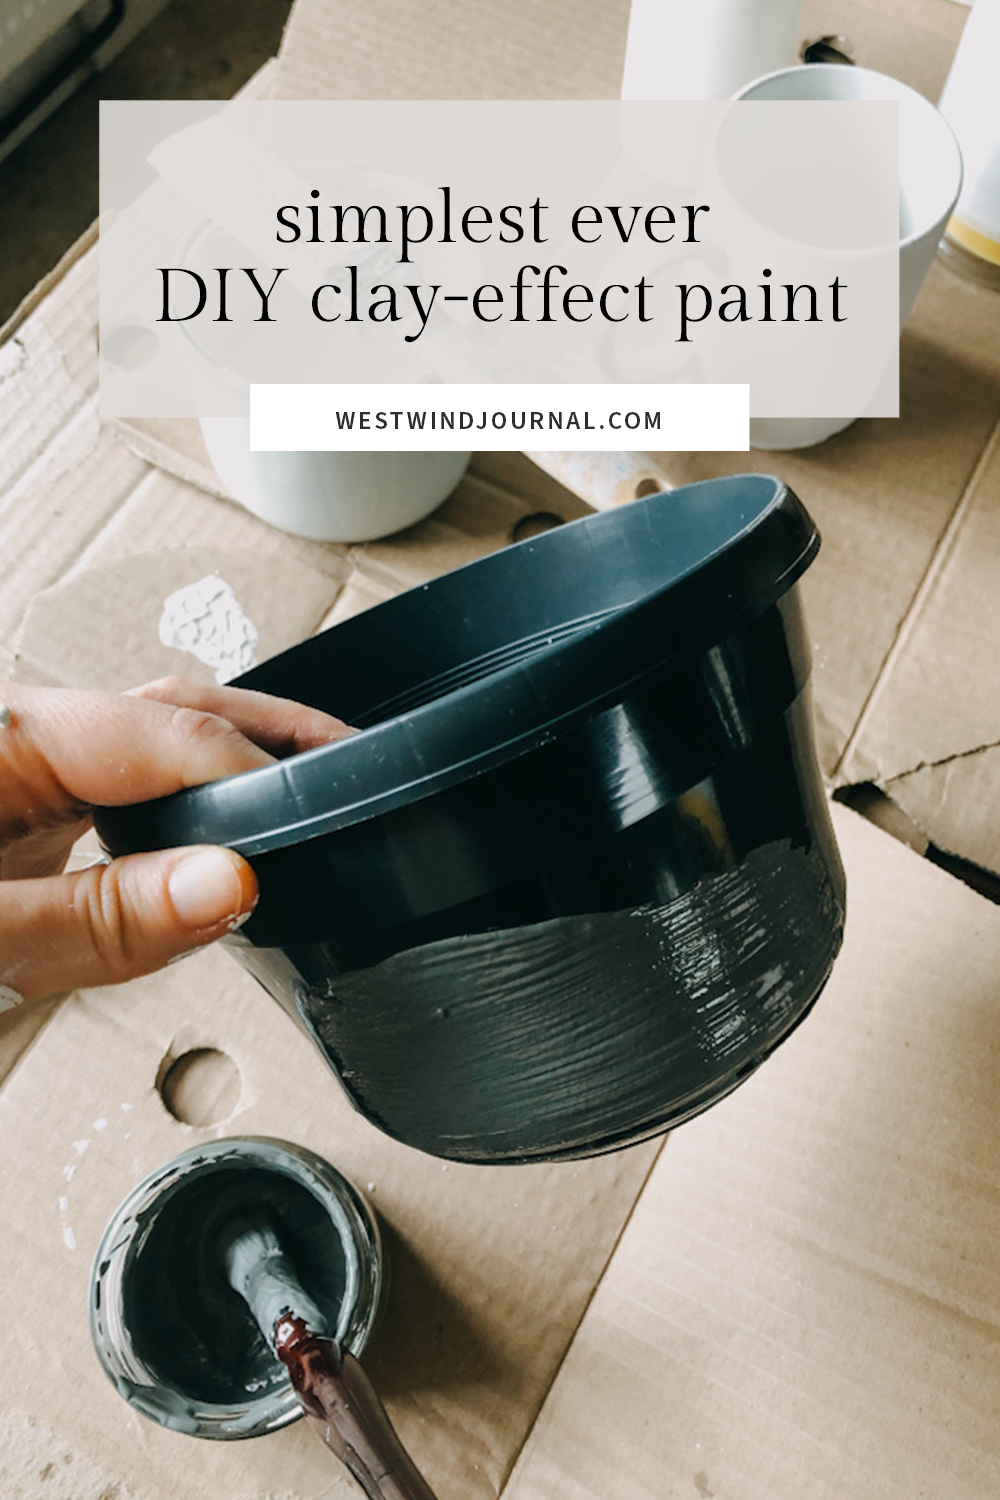
Plastic plant pot
Freebie mug with some company’s marketing on it
Tall vase that was water-damaged at the bottom
Round vase whose color doesn’t quite fit with our house
Decorative elephant thingamabob


…And I got to work.
DIY clay-effect paint tips
To make the paint, Geneva says to mix:
A cup of water-based wall paint
1 tablespoon of baking powder
Buuuuuut I didn’t do that. 😜
I’d seen other bloggers say baking soda worked, too, and I have a teeny container of organic baking powder I didn’t want to waste (vs. a huge bulk bucket of baking soda.)
Plus, I didn’t think I’d need a full cup of paint in each color.
So I just poured some paint in a jar, then slowly mixed in baking soda until the consistency felt right. 👌🏻

It worked fine for me! So I wouldn’t worry about sticking to measurements. Just add the baking powder/soda slowly until you’ve got a semi-thick mix that feels good to you.
A FEW TIPS I PICKED UP DURING THE EXPERIMENT:
Paint in light coats. I went kinda heavy in the beginning and it caused some weird textural issues to show up. The end result looks way nicer if you do a few light coats rather than one or two chunky ones.
Let the pieces dry thoroughly between coats. When I went back too soon, it pulled up paint from the previous coat…again, leading to some weird textural issues.

Paint inside the container when possible. It makes it look more legit when the inside appears clay-like too. For narrow-topped containers, just paint as far inside as you can.
Think about function, not just fashion. One potential downside is that I can see this paint scratching easily. If you’re perching a vase up on a high shelf, no problem. But if you’ll be using the items, you might need to get creative to keep them from getting ragged. One trick: tape off your item to only paint partially up the outside (I did this with the tall vase and sauerkraut jar) so the inside can remain glassy and waterproof. If you’re using any lids (like this candle jar) try painting inside the lid, so the color matches the base but you won’t mark up the chalky paint with greasy fingerprints when you open and close the jar.


Avoid intricate items. As a last-minute addition, I decided to paint over the elephant, because the bright teal never quite fit in our cottage. I couldn’t reach all the nooks and crannies inside, and while probably nobody else will look twice at it, I notice all the imperfections. If that kinda thing will bug you, stick to simpler items.
Get creative with designs. I could totally see someone artistic painting some cool patterns on their pieces! I just tried a chevron on the mug but if I had more paint colors and brush sizes, I would’ve tried polka dots and stripes.

DIY clay-effect paint project: the end results
All in all, I’m really happy with how everything turned out:

The paint has a cool textured effect to it that feels really contemporary. It breathed new life into these items…for £0. Can’t beat that!


I find that my creativity expands the tighter edges I put on it. Sure, I could’ve gone out to a thrift shop or flea market and spent £30 on a bunch of tacky vases for this project. But it feels even better that I refreshed items I already had around the house.
I bet you have more than you think you do if you open your mind and shop your home!
Plus, I can now proudly display my drunkenly-stolen Pimms pitcher in my kitchen…which is what every homeowner really wants, right? 😉
